- Change the default login credentials:
Step 1: Open your web browser and type your router’s IP address into the address bar. The default IP address for most routers is 192.168.1.1 or 192.168.0.1, but you can check your router’s documentation to be sure.
Step 2: Enter the default username and password for your router when prompted. If you don’t know the default login credentials, check your router’s documentation or search online for the model number.
Step 3: Once you’re logged in, look for the option to change the username and password. This is usually found under the “Administration” or “Settings” menu.
Step 4: Enter your new username and password and save your changes.
- Keep your router firmware up-to-date:
Step 1: Check your router’s documentation or the manufacturer’s website to find out how to access the firmware update page.
Step 2: Download the latest firmware for your router.
Step 3: Open your router’s firmware update page in your web browser and select the option to upload the new firmware.
Step 4: Wait for the update to complete, which may take a few minutes. Do not turn off your router during this process.
Step 5: Once the update is complete, restart your router to ensure that the new firmware is fully installed.
- Set up a guest network:
Step 1: Open your router’s web interface and look for the option to create a guest network. This is usually found under the “Wireless” or “Network” menu.
Step 2: Enable the guest network and choose a name and password for it.
Step 3: Save your changes and test the guest network to make sure it’s working properly.
- Enable network encryption:
Step 1: Open your router’s web interface and look for the option to enable network encryption. This is usually found under the “Wireless” or “Security” menu.
Step 2: Choose either WPA or WPA2 encryption and enter a strong passphrase.
Step 3: Save your changes and test your network to make sure it’s working properly.
- Use Quality of Service (QoS):
Step 1: Open your router’s web interface and look for the option to enable QoS. This is usually found under the “Advanced” or “Quality of Service” menu.
Step 2: Choose the types of traffic you want to prioritize, such as video streaming or gaming.
Step 3: Save your changes and test your network to make sure the prioritization is working properly.
- Disable remote access:
Step 1: Open your router’s web interface and look for the option to disable remote access. This is usually found under the “Administration” or “Security” menu.
Step 2: Disable any options that allow remote access, such as “Remote Management” or “Remote Administration.”
Step 3: Save your changes and test your network to make sure everything is working properly.
- Position your router properly:
Step 1: Choose a central location for your router that is free from obstructions and interference.
Step 2: Make sure your router is elevated off the ground and away from walls or metal objects.
Step 3: Test your network signal strength and coverage in various parts of your home or office to ensure that it’s working properly.
- Monitor your network:
Step 1: Open your router’s web interface and look for the option to monitor your network. This is usually found under the “Advanced” or “Tools” menu.
Step 2: Look for information on your network activity, connected devices, and traffic statistics.
To prevent this unintentional security risk, the simplest solution is to establish a guest WiFi network. Creating a distinct access point for guests and vulnerable devices can effectively ward off accidental cyberattacks. This article delves into the concept of a guest network, its significance, and offers a straightforward, five-step manual guide to setting one up.
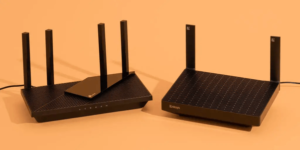
What Exactly Is a Guest Network?
A guest WiFi network provides an internet connection separate from the one used by your primary devices. The typical WiFi setup connects devices to a single router that grants internet access. By introducing a separate gateway to the internet through guest WiFi, you grant internet access to devices that may be more prone to viruses, all while safeguarding your home network from potential threats.
Is Guest WiFi Secure?
Guest WiFi is the safest way to offer internet access to your visitors while preserving the integrity of your existing network. If your guests connect to your primary network with a compromised or malware-infected device, there’s a risk of the virus spreading to your home devices connected to the same WiFi.
However, if the compromised device connects to the guest WiFi, the virus or malware remains isolated and cannot breach your home network. Additionally, guest WiFi offers an extra layer of protection for IoT devices, such as smart TVs, which are more susceptible to security vulnerabilities.
Should You Set a Password for Guest WiFi?
All WiFi networks should have passwords to prevent unknown devices from connecting. While your primary network should have a strong, complex password, it’s acceptable for guest WiFi to have a simplified password that’s easy to share and change if necessary.
How to Monitor Connected Devices on Your WiFi
You can monitor the devices connected to your WiFi by accessing your router’s web interface. If you suspect unknown devices have gained access to your network, you can remove them via the interface.
If you don’t recognize the devices listed in your router’s web interface, it’s wise to change the WiFi password. This will require all users to enter the new password to regain network access.
How to Establish a Guest WiFi Network?
Creating a guest WiFi network is often as straightforward as adjusting your preferences. Most routers offer options for adding additional networks through the administrator settings. Here are the steps to manually configure your router settings and set up a guest network:
Step 1: Locate your router in your web browser. Find the router’s IP address in the user manual or on the router itself, and input it into your browser’s search bar.
Step 2: Log in to your router with administrator access.
Step 3: Modify the existing network settings. Locate your wireless or router settings and select the option to enable a guest network.
Step 4: Name the network. After enabling guest WiFi, set the network name in the SSID field. Most routers will automatically append “-guest” to the existing network name by default.
Step 5: Configure the guest network settings. Create a new password and select a network security method (WPA or WPA2). Ensure that guests cannot access the primary network and its settings.
By establishing a separate WiFi network for guests and vulnerable smart devices, you add an extra layer of security to your primary network. Often, viruses operate with the primary objective of infecting as many devices as possible, and creating a distinct access point for WiFi is a proactive defense against potential cyberattacks on your network.
- Check your internet plan: If you’re not getting the WiFi speed you want, check your internet plan to ensure that it’s fast enough to support the speeds you want. If you’re not sure what your internet speed is, you can use an online speed test tool to measure it. If your current plan isn’t fast enough, consider upgrading to a plan that supports faster speeds.
- Position your router: The position of your router can have a big impact on your WiFi speed. It’s best to place your router in a central location away from walls and other obstructions. This can help ensure that your WiFi signal is not obstructed by physical barriers. Additionally, try to keep your router away from other electronics that may interfere with the signal.
- Reduce interference: Other electronic devices in your home can interfere with your WiFi signal and cause slow speeds or signal drops. To reduce interference, try the following steps:
- Move your router to a central location, away from walls and obstacles.
- Keep your router away from other electronic devices that can cause interference, such as microwaves, cordless phones, baby monitors, and Bluetooth devices.
- Use a WiFi analyzer app to identify the channels that other nearby WiFi networks are using. Then, select a different channel on your router that is less congested.
- Upgrade your router: If your router is old or outdated, upgrading to a newer model can help improve your WiFi speed. Newer routers are typically faster and can support the latest WiFi standards, such as 802.11ac or 802.11ax. When choosing a new router, consider factors such as speed, range, and the number of connected devices it can support.
- Change your WiFi channel: If you’re experiencing interference from other WiFi networks, changing the channel on your router can help. Most routers come with a default channel, but there are several channels to choose from. Use a WiFi analyzer app to identify the channels that are least congested, and then select that channel on your router.
- Limit connected devices: Having too many devices connected to your network can slow down your WiFi speed. To limit the number of connected devices, you can do the following:
- Disconnect devices that you’re not currently using.
- Turn off devices that are not essential, such as smart home devices that you’re not using.
- Use a separate guest network for devices that you don’t trust or that don’t need to be on your main network.
- Use a wired connection: If possible, use a wired Ethernet connection instead of WiFi for devices that require high-speed internet, like gaming consoles or desktop computers. Wired connections are generally faster and more reliable than wireless connections.
- Limit the number of connected devices: Too many connected devices can slow down your WiFi speed. Try limiting the number of devices connected to your network, especially if they’re not actively being used.
- Enable Quality of Service (QoS): QoS is a feature that can help prioritize certain types of traffic on your network, such as video streaming or gaming. Enabling QoS can help ensure that these activities get the necessary bandwidth and are not interrupted by other devices on your network. To enable QoS, log in to your router’s settings and look for the QoS or Traffic Management option. From there, you can prioritize specific types of traffic or devices on your network.
By implementing these tips, you can optimize your WiFi network and potentially increase your speed, reliability, and performance.
