In this blog, we’ll guide you step-by-step through selecting the right CCTV camera for your needs. From camera type to resolution, night vision capabilities to storage and connectivity, we’ll cover all the important factors you must consider. We’ll even highlight some key features and specifications that you might not have thought of.
By the end of this blog, you’ll have all the knowledge and confidence you need to make an informed decision and enhance the security of your property. So, let’s get started!

- Consider the location
The location where you plan to install your CCTV camera is essential. Consider a discreet dome camera for indoor use that blends in with the surroundings. On the other hand, outdoor cameras should be weatherproof and able to withstand extreme temperatures. A bullet camera is popular for outdoor use as it is typically weatherproof and can cover long distances.
- Determine your needs
The first step in selecting the right CCTV camera for your home or office is determining your needs. For example, do you want to monitor activity inside your home or office? Or are you looking for a camera to monitor the exterior of your property? The type of camera you choose will depend on your specific needs. For example, you’ll want a camera with night vision capabilities if you need to monitor activity in low-light conditions.
- Decide on the camera type
Several different types of CCTV cameras are available, each with unique features and specifications. Some common types of CCTV cameras include dome, bullet, PTZ, and thermal cameras. Dome cameras are popular for indoor use, while bullet cameras are ideal for outdoor monitoring. PTZ cameras are valuable when covering a large area, and thermal cameras are helpful in low-light conditions.
- Resolution
The resolution of a CCTV camera refers to the number of pixels it can capture. The higher the resolution, the more detailed the images will be. Resolution is typically measured in horizontal and vertical pixels, such as 1080p or 4K. Keep in mind that higher-resolution cameras may require more storage space.
- Night Vision
Most CCTV cameras have infrared (IR) LEDs that provide night vision capabilities. The IR range is important as it determines how far the camera can see in the dark. Look for a longer IR range camera if you need to monitor a larger area.
- Storage
CCTV cameras typically store footage on a digital video recorder (DVR) or network video recorder (NVR). Some cameras have built-in storage, while others require an external hard drive. Cloud-based storage is also an option for some cameras. Consider how much footage you want to store and choose a storage option that meets your needs.
- Connectivity
Many CCTV cameras connect to a network via Wi-Fi or Ethernet. Some cameras also have mobile apps that allow you to view live or recorded footage from your smartphone or tablet. Make sure the camera you choose has the connectivity options you need.
- Brand and quality
Choosing a reputable brand with good reviews can help ensure you get a high-quality product. Also, look for cameras that are easy to install and use and have the features you need to achieve your goals.
In summary, selecting the right CCTV camera can be overwhelming, but Cable Connector makes it easy. Our expert engineers and knowledgeable team will help you find the perfect camera to fit your needs and budget.
Moreover, with a wide range of high-quality products from reputable brands, you can trust that you’re getting the best possible CCTV camera for your property. So, let Cable Connector enhance the security of your home or office today!
- Change the default login credentials:
Step 1: Open your web browser and type your router’s IP address into the address bar. The default IP address for most routers is 192.168.1.1 or 192.168.0.1, but you can check your router’s documentation to be sure.
Step 2: Enter the default username and password for your router when prompted. If you don’t know the default login credentials, check your router’s documentation or search online for the model number.
Step 3: Once you’re logged in, look for the option to change the username and password. This is usually found under the “Administration” or “Settings” menu.
Step 4: Enter your new username and password and save your changes.
- Keep your router firmware up-to-date:
Step 1: Check your router’s documentation or the manufacturer’s website to find out how to access the firmware update page.
Step 2: Download the latest firmware for your router.
Step 3: Open your router’s firmware update page in your web browser and select the option to upload the new firmware.
Step 4: Wait for the update to complete, which may take a few minutes. Do not turn off your router during this process.
Step 5: Once the update is complete, restart your router to ensure that the new firmware is fully installed.
- Set up a guest network:
Step 1: Open your router’s web interface and look for the option to create a guest network. This is usually found under the “Wireless” or “Network” menu.
Step 2: Enable the guest network and choose a name and password for it.
Step 3: Save your changes and test the guest network to make sure it’s working properly.
- Enable network encryption:
Step 1: Open your router’s web interface and look for the option to enable network encryption. This is usually found under the “Wireless” or “Security” menu.
Step 2: Choose either WPA or WPA2 encryption and enter a strong passphrase.
Step 3: Save your changes and test your network to make sure it’s working properly.
- Use Quality of Service (QoS):
Step 1: Open your router’s web interface and look for the option to enable QoS. This is usually found under the “Advanced” or “Quality of Service” menu.
Step 2: Choose the types of traffic you want to prioritize, such as video streaming or gaming.
Step 3: Save your changes and test your network to make sure the prioritization is working properly.
- Disable remote access:
Step 1: Open your router’s web interface and look for the option to disable remote access. This is usually found under the “Administration” or “Security” menu.
Step 2: Disable any options that allow remote access, such as “Remote Management” or “Remote Administration.”
Step 3: Save your changes and test your network to make sure everything is working properly.
- Position your router properly:
Step 1: Choose a central location for your router that is free from obstructions and interference.
Step 2: Make sure your router is elevated off the ground and away from walls or metal objects.
Step 3: Test your network signal strength and coverage in various parts of your home or office to ensure that it’s working properly.
- Monitor your network:
Step 1: Open your router’s web interface and look for the option to monitor your network. This is usually found under the “Advanced” or “Tools” menu.
Step 2: Look for information on your network activity, connected devices, and traffic statistics.
Step into a modern classroom, and you’ll find a world transformed. Gone are the days of dusty chalkboards and passive learning. In this blog, we embark on a thrilling journey to explore the incredible universe of interactive displays in education – a revolution that’s breathing new life into the way we learn and teach.
The Interactive Display – A Game Changer
What exactly is this interactive display that’s causing waves in education? An interactive display, also known as an Interactive Flat Panel Display, is your ticket to an immersive learning experience. It’s a dynamic, wall-mounted device that responds to your touch, allowing you to create captivating visual presentations and engage with digital content in real-time.
These interactive LCD panels come in various sizes and have found their way into classrooms, from preschools to corporate boardrooms. They’re the secret behind interactive, engaging learning experiences that students yearn for.
The Classroom Reinvented
Why are interactive displays essential in the classroom? It’s all about creating an interactive, engaging, and collaborative learning environment. These screens offer a multi-touch experience that brings students closer together. No more passively sitting at the back – students gather around the screen, sharing ideas, commenting on presentations, and exploring supplementary materials like detailed maps and images.
But that’s not all. Interactive displays aren’t just about upgrading the learning experience; they’re also breathing new life into traditional teaching methods. Even in a classic classroom setup, with the teacher at the front, students can now wirelessly project their work, encouraging whole-class discussions. This new-age technology grants teachers unprecedented freedom and flexibility.

Features That Define the Magic
- Quality of Screen Display: These interactive displays amaze with ultra-high-definition 4K resolution, ensuring crystal-clear images viewable from every corner of the classroom. Plus, there’s low-glare glass for an optimal viewing experience.
- Touch Capability: The touchscreen experience is so natural it feels like magic, enabling you to annotate, highlight, move objects, and write with grace and precision. And it’s not just about touch – these displays recognize stylus, finger, and palm interactions.
- Operating Systems Compatibility: They’re friends with popular operating systems like Android, Windows, and macOS, eliminating the need for extra devices and making content directly accessible.
- Collaboration Features: Interactive displays can sync with cloud accounts, making remote collaboration a breeze. Screen mirroring lets remote students actively participate, and teachers can share content efficiently.
- Turnkey Solution: Some displays come complete with classroom software and learning apps, empowering teachers to craft interactive lessons featuring various media, questions, and more.
Benefits Unveiled
The journey continues as we uncover the treasures brought by interactive displays in education:
- Enhanced Interaction and Collaboration: These displays promote active learning, encourage group interactions, and ignite brainstorming sessions.
- Increased Student Engagement: Students in classrooms with interactive displays are more attentive and engaged, transcending grade levels.
- Support for All Learning Styles: The displays cater to diverse learning styles, fostering inclusivity and catering to kinesthetic, visual, auditory, and assistive technology learners.
- Effective Classroom Management: Interactive displays create a productive classroom with engaging tools like timers and interactive activities.
- Effective Communication: They enhance communication between teachers and students and can be used to share important messages or alerts.
- Feedback and Ease of Use: Interactive displays offer valuable feedback for students and are incredibly user-friendly.
Conclusion: Where Innovation Meets Education
The educational landscape is undergoing a transformation, and interactive displays are at the heart of this revolution. These dynamic tools empower teachers to craft engaging, interactive lessons, while students experience an immersive learning journey. Together, they are reshaping the future of education, one interactive touch at a time. So, join the revolution and discover the magic of interactive displays in education!
To prevent this unintentional security risk, the simplest solution is to establish a guest WiFi network. Creating a distinct access point for guests and vulnerable devices can effectively ward off accidental cyberattacks. This article delves into the concept of a guest network, its significance, and offers a straightforward, five-step manual guide to setting one up.

What Exactly Is a Guest Network?
A guest WiFi network provides an internet connection separate from the one used by your primary devices. The typical WiFi setup connects devices to a single router that grants internet access. By introducing a separate gateway to the internet through guest WiFi, you grant internet access to devices that may be more prone to viruses, all while safeguarding your home network from potential threats.
Is Guest WiFi Secure?
Guest WiFi is the safest way to offer internet access to your visitors while preserving the integrity of your existing network. If your guests connect to your primary network with a compromised or malware-infected device, there’s a risk of the virus spreading to your home devices connected to the same WiFi.
However, if the compromised device connects to the guest WiFi, the virus or malware remains isolated and cannot breach your home network. Additionally, guest WiFi offers an extra layer of protection for IoT devices, such as smart TVs, which are more susceptible to security vulnerabilities.
Should You Set a Password for Guest WiFi?
All WiFi networks should have passwords to prevent unknown devices from connecting. While your primary network should have a strong, complex password, it’s acceptable for guest WiFi to have a simplified password that’s easy to share and change if necessary.
How to Monitor Connected Devices on Your WiFi
You can monitor the devices connected to your WiFi by accessing your router’s web interface. If you suspect unknown devices have gained access to your network, you can remove them via the interface.
If you don’t recognize the devices listed in your router’s web interface, it’s wise to change the WiFi password. This will require all users to enter the new password to regain network access.
How to Establish a Guest WiFi Network?
Creating a guest WiFi network is often as straightforward as adjusting your preferences. Most routers offer options for adding additional networks through the administrator settings. Here are the steps to manually configure your router settings and set up a guest network:
Step 1: Locate your router in your web browser. Find the router’s IP address in the user manual or on the router itself, and input it into your browser’s search bar.
Step 2: Log in to your router with administrator access.
Step 3: Modify the existing network settings. Locate your wireless or router settings and select the option to enable a guest network.
Step 4: Name the network. After enabling guest WiFi, set the network name in the SSID field. Most routers will automatically append “-guest” to the existing network name by default.
Step 5: Configure the guest network settings. Create a new password and select a network security method (WPA or WPA2). Ensure that guests cannot access the primary network and its settings.
By establishing a separate WiFi network for guests and vulnerable smart devices, you add an extra layer of security to your primary network. Often, viruses operate with the primary objective of infecting as many devices as possible, and creating a distinct access point for WiFi is a proactive defense against potential cyberattacks on your network.
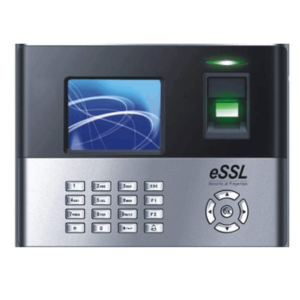

2. Palm Recognition Biometric
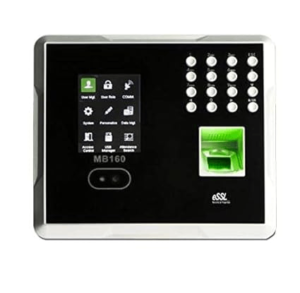
3. Face recognition Biometric
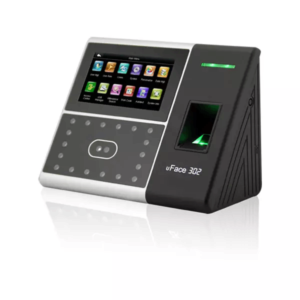
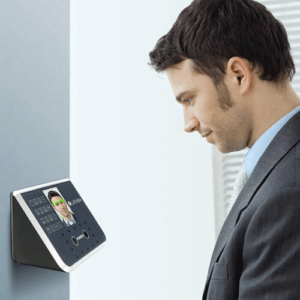
4. Iris Recognition Biometric

Application of Biometrics
1. Hotel

2. Schools & Colleges (education)

3. Factory

4. WareHouse

5. Hospital

6. Office

- Check your internet plan: If you’re not getting the WiFi speed you want, check your internet plan to ensure that it’s fast enough to support the speeds you want. If you’re not sure what your internet speed is, you can use an online speed test tool to measure it. If your current plan isn’t fast enough, consider upgrading to a plan that supports faster speeds.
- Position your router: The position of your router can have a big impact on your WiFi speed. It’s best to place your router in a central location away from walls and other obstructions. This can help ensure that your WiFi signal is not obstructed by physical barriers. Additionally, try to keep your router away from other electronics that may interfere with the signal.
- Reduce interference: Other electronic devices in your home can interfere with your WiFi signal and cause slow speeds or signal drops. To reduce interference, try the following steps:
- Move your router to a central location, away from walls and obstacles.
- Keep your router away from other electronic devices that can cause interference, such as microwaves, cordless phones, baby monitors, and Bluetooth devices.
- Use a WiFi analyzer app to identify the channels that other nearby WiFi networks are using. Then, select a different channel on your router that is less congested.
- Upgrade your router: If your router is old or outdated, upgrading to a newer model can help improve your WiFi speed. Newer routers are typically faster and can support the latest WiFi standards, such as 802.11ac or 802.11ax. When choosing a new router, consider factors such as speed, range, and the number of connected devices it can support.
- Change your WiFi channel: If you’re experiencing interference from other WiFi networks, changing the channel on your router can help. Most routers come with a default channel, but there are several channels to choose from. Use a WiFi analyzer app to identify the channels that are least congested, and then select that channel on your router.
- Limit connected devices: Having too many devices connected to your network can slow down your WiFi speed. To limit the number of connected devices, you can do the following:
- Disconnect devices that you’re not currently using.
- Turn off devices that are not essential, such as smart home devices that you’re not using.
- Use a separate guest network for devices that you don’t trust or that don’t need to be on your main network.
- Use a wired connection: If possible, use a wired Ethernet connection instead of WiFi for devices that require high-speed internet, like gaming consoles or desktop computers. Wired connections are generally faster and more reliable than wireless connections.
- Limit the number of connected devices: Too many connected devices can slow down your WiFi speed. Try limiting the number of devices connected to your network, especially if they’re not actively being used.
- Enable Quality of Service (QoS): QoS is a feature that can help prioritize certain types of traffic on your network, such as video streaming or gaming. Enabling QoS can help ensure that these activities get the necessary bandwidth and are not interrupted by other devices on your network. To enable QoS, log in to your router’s settings and look for the QoS or Traffic Management option. From there, you can prioritize specific types of traffic or devices on your network.
By implementing these tips, you can optimize your WiFi network and potentially increase your speed, reliability, and performance.

 Download kms activator 100% free
Download KMS Activator for Windows 10 to Activate Windows and Office Products
If you want to activate your Windows 10 operating system or Microsoft Office products, downloading a KMS activator for Windows 10 can be a helpful solution. This tool is designed to activate Windows and Office without needing to buy a license key. Many users look for a reliable KMS activator download for Windows 10 because it offers a quick and easy way to unlock full features on their software.
Using a KMS activator for Windows 10 allows you to enjoy all the benefits of genuine Windows and Office products. It works by simulating a Key Management Service (KMS) server, which activates your software temporarily. This method is popular because it supports multiple versions of Windows and Office, making it a versatile option for many users.
When you download KMS activator for Windows 10, you should always ensure that the source is safe and trustworthy. This helps protect your computer from viruses or malware that can come with unsafe downloads. After activation, your Windows and Office products will function as if they were officially licensed, giving you access to updates and security features.
 Get kms activator free download
How to Download and Install KMS Activator for Windows 10 Safely
Downloading a windows 10 activation utility like the KMS activator download for windows 10 free requires careful steps to ensure your computer stays safe. This windows 10 activation approach helps you activate both Windows and Office products without needing a license key. To avoid risks, always check that the file is clean and free from viruses before installing.
Using a kms activator for office or windows 10 activator download can be a great windows 10 activation solution, but safety should come first. Follow the right steps to install and use the tool properly to enjoy full features on your software.
System Requirements for Running KMS Activator for Windows 10
Before starting the installation, make sure your system meets these requirements:
| Requirement | Details |
|---|---|
| Operating System | Windows 10 (all editions) |
| RAM | Minimum 2 GB |
| Disk Space | At least 100 MB free |
| Administrator Rights | Required for installation |
| Internet Connection | Not necessary for offline activation |
These requirements ensure the kms activator download for windows 10 runs smoothly and activates your software without issues.
Step-by-Step Installation and Setup Guide for KMS Activator
- Download the Tool: Get the kms activator download for windows 10 free from a safe source.
- Disable Antivirus Temporarily: Some antivirus programs may block the activator.
- Run as Administrator: Right-click the file and select “Run as administrator” to start the installation.
- Follow On-Screen Instructions: The windows 10 activation utility will guide you through the process.
- Activate Windows and Office: Use the kms activator for office feature if you want to activate Microsoft Office products as well.
- Restart Your Computer: This helps complete the activation process.
Using KMS Activator for Offline Windows 10 and Office Activation
One of the best features of this windows 10 activation solution is that it works offline. This means you can activate your Windows 10 and Office products without an internet connection.
“Offline activation is useful when you don’t have access to the internet but still need to unlock full software features.”
To use the kms activator for office or windows 10 activator download offline:
- Run the activator as administrator.
- Choose the offline activation option.
- Wait for the tool to complete the process.
- Verify activation status in system settings.
This windows 10 activation approach is convenient and reliable for users who want to activate their software anytime, anywhere.
Key Features and Activation Methods of KMS Activator for Windows 10
KMS activator for Windows 10 is a popular windows 10 activation software that helps users unlock all the features of their operating system without purchasing a license key. This tool uses the kms activation method, which simulates a Key Management Service server to activate Windows temporarily. It also supports activating Microsoft Office products through the kms activator for office feature.
Using this windows 10 activation technique allows users to enjoy a full windows 10 feature unlock, including updates and security patches. The activator is designed to be user-friendly and works with different versions of Windows 10, making it a versatile choice for many users.
| Feature | Description |
|---|---|
| Activation Method | KMS activation method simulating a KMS server |
| Supported Products | Windows 10 editions and Microsoft Office suites |
| Activation Duration | Temporary activation with easy renewal options |
| Offline Activation Capability | Can activate without internet connection |
| User Interface | Simple and easy to use with one-click activation |
How KMS Activator Bypasses Windows 10 Pro Activation Key
The kms activation method works by emulating a KMS server on your local machine. When you run the windows 10 activation software, it tricks Windows 10 Pro into thinking it has connected to a genuine KMS server. This bypasses the need for a real activation key.
This windows 10 activation technique temporarily activates the system, allowing full access to all features. The kms activator for office uses a similar process to activate Microsoft Office products, ensuring both Windows and Office are fully functional.
One-Click Activation Process for Windows 10 and Office Suite
The activation process with this windows 10 activation software is straightforward and fast. Users simply need to:
- Download the kms activator for office or Windows 10 tool.
- Run the program as an administrator.
- Click the activation button to start the kms activation method.
- Wait a few moments for the activation to complete.
This one-click activation process unlocks all Windows 10 features and activates Office products without complicated steps or manual input of license keys.
Compatibility with Windows 10 64-Bit and Windows 11 Systems
This windows 10 activation technique is compatible with both 64-bit versions of Windows 10 and newer Windows 11 systems. The kms activation method adapts to different system architectures, making it a reliable choice for users upgrading their operating system.
Whether you have Windows 10 Pro, Home, or Windows 11, the kms activator for office and Windows 10 can activate your software smoothly, ensuring access to all features and updates.
Benefits of Using KMS Activator for Full Windows 10 Activation and Office Product Activation
Using this windows 10 activation software offers several advantages:
- Cost-Effective: No need to buy expensive license keys.
- Full Feature Unlock: Access all Windows 10 features and Office tools.
- Offline Activation: Activate without internet connection.
- Easy to Use: Simple interface with one-click activation.
- Supports Multiple Products: Works for both Windows 10 and Microsoft Office.
“The kms activation method provides a quick and effective way to enjoy genuine Windows and Office experiences without purchasing licenses.”
Frequently Asked Questions About KMS Activator for Windows 10
Many users have questions about using a windows 10 activation software like the KMS activator. This section answers common queries to help you understand how this windows 10 activation solution works and what to expect.
Is KMS Activator Download for Windows 10 Free and Safe?
The kms activator download for windows 10 free is often available from various sources. While it may be free, safety depends on where you get it. Always ensure the file is scanned for viruses before running it.
- Free to download: Yes, many versions are available at no cost.
- Safety concerns: Risk of malware if downloaded from untrusted sites.
- Recommendation: Use antivirus software and trusted sources.
“Downloading from unknown sites can harm your computer, so be cautious.”
Can KMS Activator Be Used for Offline Activation?
Yes, one of the main benefits of this windows 10 activation solution is offline activation.
- No internet needed: You can activate Windows 10 and Office without an internet connection.
- How it works: The activator simulates a KMS server locally.
- Convenience: Useful for users with limited or no internet access.
What Are the Advantages of Using a KMS Server Emulator?
Using a KMS server emulator in the windows 10 activation software offers several benefits:
| Advantage | Explanation |
|---|---|
| Temporary Activation | Activates Windows and Office for a limited time |
| Multiple Devices | Can activate several computers using one tool |
| No License Key Needed | Bypasses the need to enter a product key |
| Easy to Use | Simple activation process with minimal steps |
This makes the kms activator a popular windows 10 activation solution for many users.
How Often Do I Need to Reactivate Using KMS Activator?
The activation provided by the kms activator is temporary and requires renewal.
- Typical duration: Activation lasts about 180 days.
- Renewal process: The activator can be run again to extend activation.
- Automation: Some versions offer automatic reactivation.
Regular reactivation ensures Windows 10 and Office remain fully functional.
Does KMS Activator Affect Windows 10 Update Access?
Using this windows 10 activation software generally does not block access to Windows updates.
- Updates available: You can still receive important security and feature updates.
- No official license: The system may still show activation warnings.
- Caution: Some updates might interfere with the activator, requiring reactivation.
]]>“Windows updates are important for security, and the kms activator usually allows them without problems.”

Access Telegram 18+ Content: A Guide to Adult Groups and Channels
Accessing Telegram 18+ content can be an interesting experience for those looking for adult-oriented channels. These channels often feature mature content and explicit groups that cater to various interests. However, it is important to understand the need for age verification to ensure that only adults participate in these discussions.
One of the key aspects of Telegram 18+ content is the emphasis on privacy features. Users can enjoy anonymous participation, which allows them to engage without revealing their identities. This is particularly appealing for those who wish to explore adult content without the fear of being judged.
Method 1: Use an Android Device to Access Telegram 18+
Using an Android device is a popular way to access Telegram 18+ content. Many users prefer their phones for convenience and ease of use. With the right settings, you can join adult Telegram channels and private adult groups that focus on various interests.
To get started, you need to download the Telegram app from the Google Play Store. Once installed, you can create an account and begin exploring Telegram adult communities.
Why Telegram is Popular for Adult Content
Telegram is known for its NSFW Telegram channels and adult-themed channels. Many people enjoy using it because it offers a space for a mature audience to share and discuss adult content. The platform allows users to connect with others who have similar interests, making it a great place for those looking for adult content.
The privacy features of Telegram also play a big role in its popularity. Users can join groups without revealing their identities, which makes it easier to engage in discussions about sensitive topics.
Steps to Enable 18+ Content on Android
To access age-restricted content on Telegram, you need to adjust your Telegram privacy settings. Here are some simple steps to follow:
- Open the Telegram App: Launch the app on your Android device.
- Go to Settings: Tap on the menu icon and select “Settings.”
- Privacy and Security: Find the “Privacy and Security” section.
- Content Restrictions: Look for options related to adult content access and adjust them as needed.
Method 2: Use a Windows/Mac/Linux Device for Telegram 18+
Using a computer to access Telegram 18+ content can be a great option for many users. Whether you are on Windows, Mac, or Linux, you can easily join Telegram explicit channels and participate in adult content sharing.
This method allows for a larger screen and easier navigation, making it simple to explore various adult groups and channels.
Fast Access to Adult Groups on Desktop
When using a desktop device, you can quickly find Telegram mature groups and join adult group chats. The larger interface makes it easier to view and interact with content.
Here are some benefits of using a computer for Telegram explicit sharing:
- Larger Display: Easier to read and view content.
- Keyboard Access: Faster typing and communication.
- Multi-Tasking: Switch between different chats and channels easily.
Changes in Telegram’s Privacy Features
Telegram has made several updates to its privacy options, especially for adult content privacy. Users can now enjoy enhanced Telegram anonymity while participating in adult discussions.
Here are some important privacy features to consider:
- Anonymous Participation: Join groups without revealing your identity.
- Content Control: Manage who can see your shared content.
- Secure Settings: Adjust privacy settings to fit your comfort level.

Understanding Telegram’s Terms of Service for Adult Content
When using Telegram for adult content, it’s essential to understand the platform’s Terms of Service. These rules help ensure that users engage in adult content anonymity and follow guidelines for explicit material sharing.
Telegram has specific policies regarding age-restricted groups. Users must be aware that joining these groups requires them to confirm their age, ensuring that only adults participate in discussions.
Terms of Service for Telegram Stars
Telegram Stars is a feature that allows users to access adult content groups. These groups often contain Telegram mature content that caters to various interests.
It’s important to note that users must adhere to the community guidelines when sharing or accessing content. This ensures a safe environment for everyone involved.
Terms of Service for Telegram Premium
Telegram Premium offers enhanced adult content access and additional features. Users can enjoy better privacy features, which help protect their identities while engaging in adult discussions.
Here are some key points about Telegram Premium:
- Enhanced Privacy: Users can maintain their anonymity while participating in adult content.
- Exclusive Groups: Access to special adult content groups that may not be available to regular users.
- Improved Features: Additional tools for managing content and interactions within adult groups.
Frequently Asked Questions
Many people have questions about accessing adult content on Telegram. Here are some common inquiries and their answers.
What is Telegram 18+?
Telegram 18+ refers to channels and groups that focus on adult-oriented channels. These spaces often share mature content that is meant for adults only.
- Adult-oriented channels: These are specific groups where users can discuss and share adult content.
- Mature content: This includes any material that is not suitable for children and is intended for a grown-up audience.
How can I verify my age on Telegram?
To access adult content on Telegram, you need to go through age verification. This process ensures that only adults can join these groups.
- Age verification: This is a method used to confirm that you are old enough to access adult content.
- Adult content access: Once verified, you can freely join and participate in adult groups.
Is it safe to join Telegram 18+ groups?
Joining Telegram 18+ groups can be safe if you follow the right steps. It’s important to pay attention to your adult content privacy.
- Adult content privacy: This refers to the measures you take to keep your information safe while engaging in adult discussions.
- Telegram privacy settings: Adjusting these settings can help protect your identity and ensure a secure experience in adult groups.